Tuesday, November 28, 2006

A Tight Fit

This past Sunday, I attached the finish layer panels to the panel wainscoting. Now, it's ready for the stiles and cap molding and baseboards to be attached. Though it's not much to see, here's a picture of the north wall of the dining room so far:


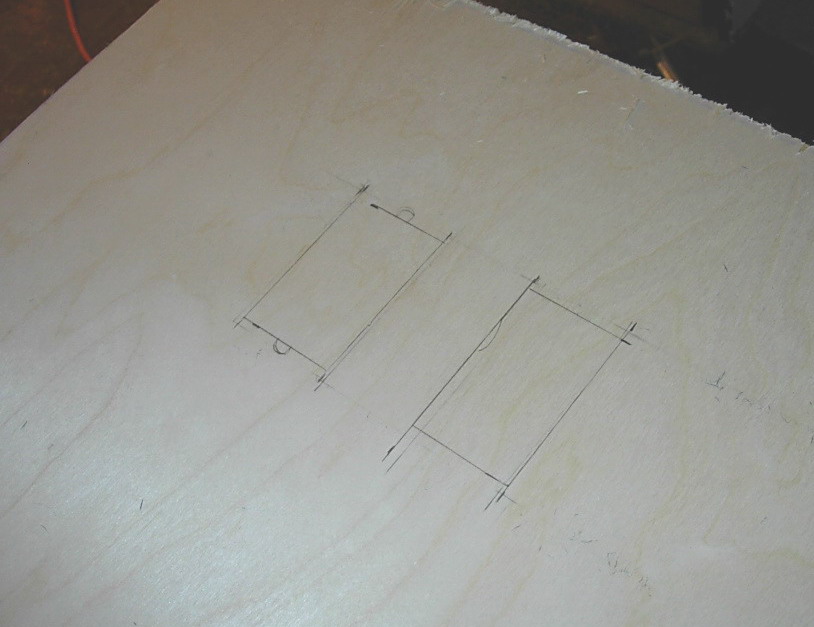
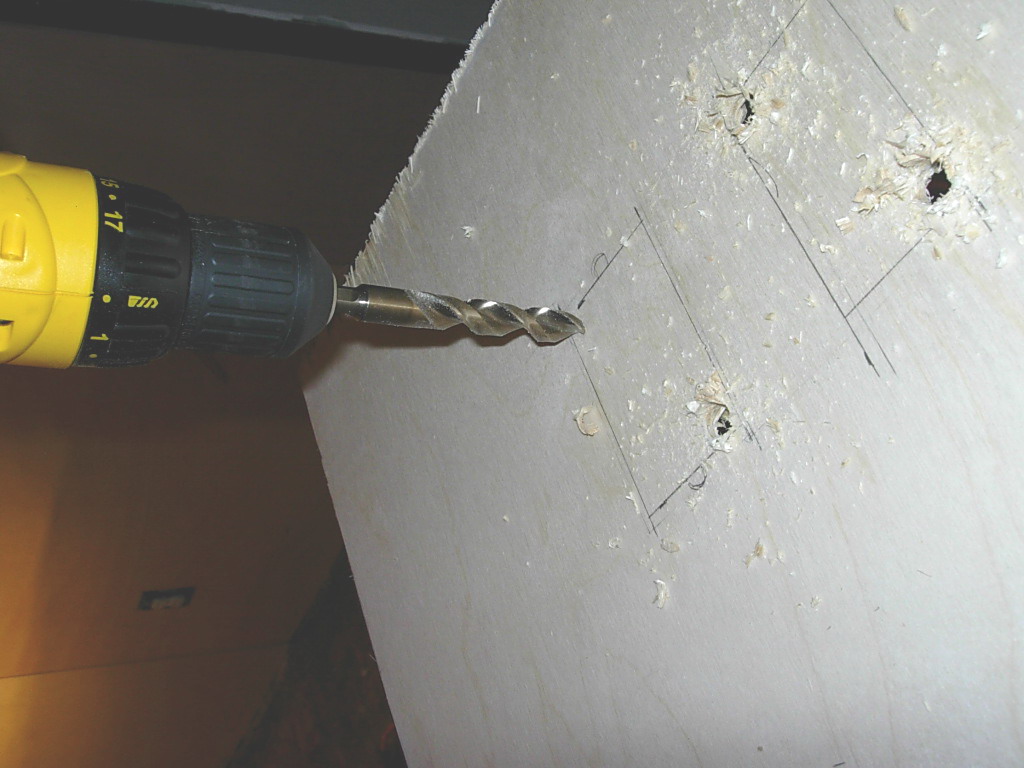
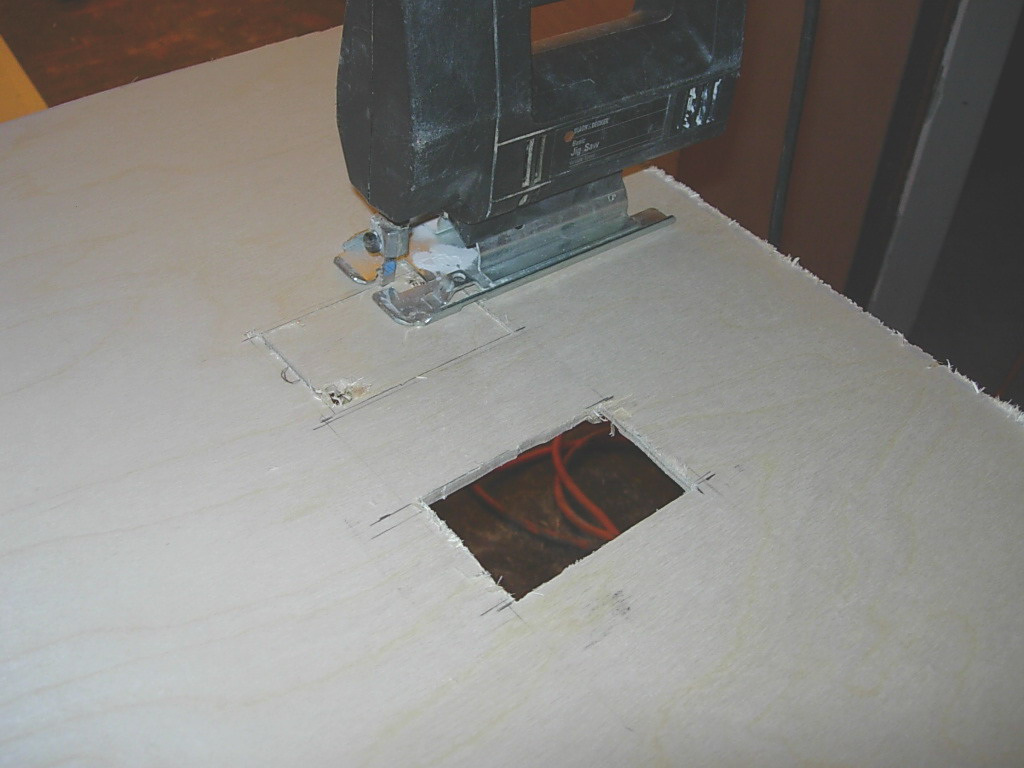
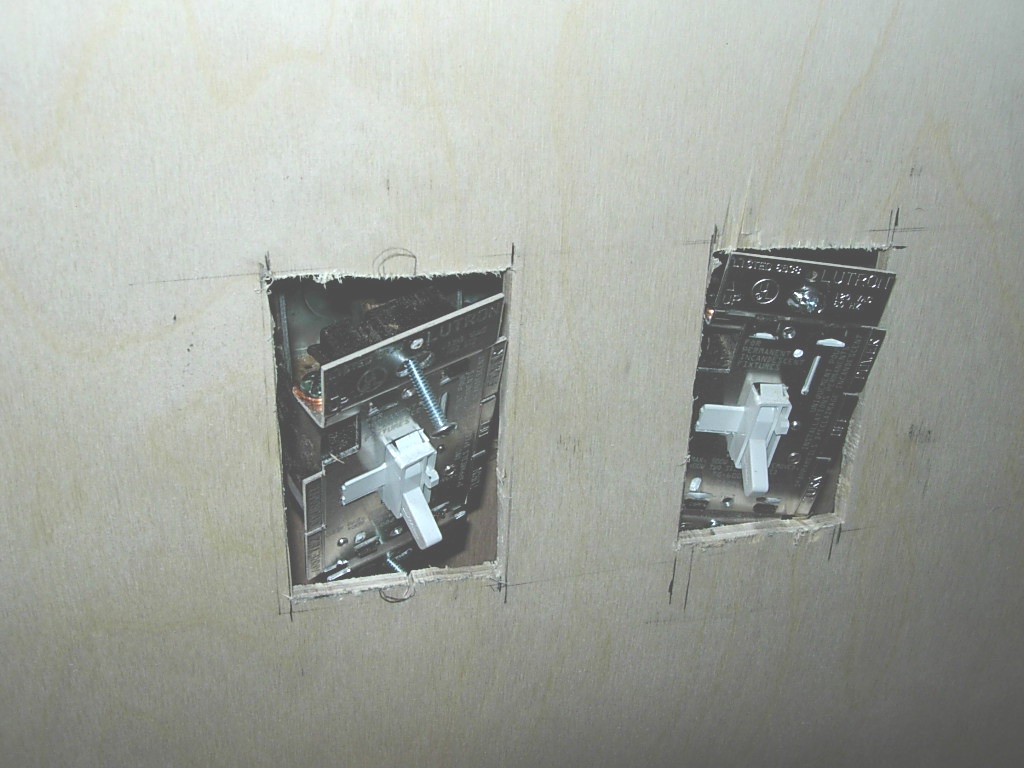
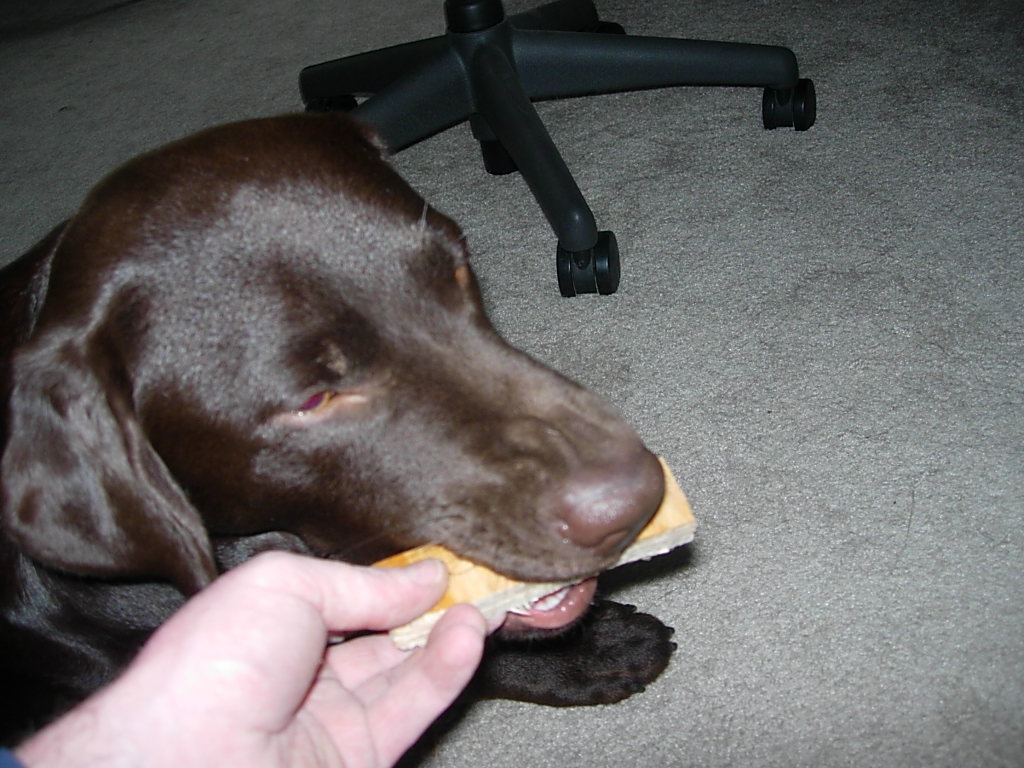
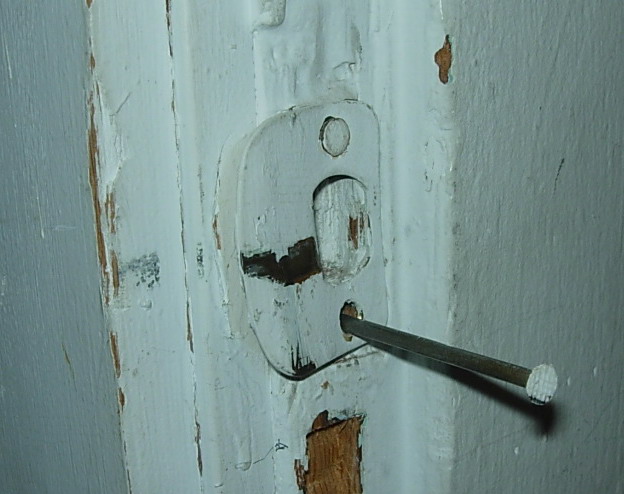
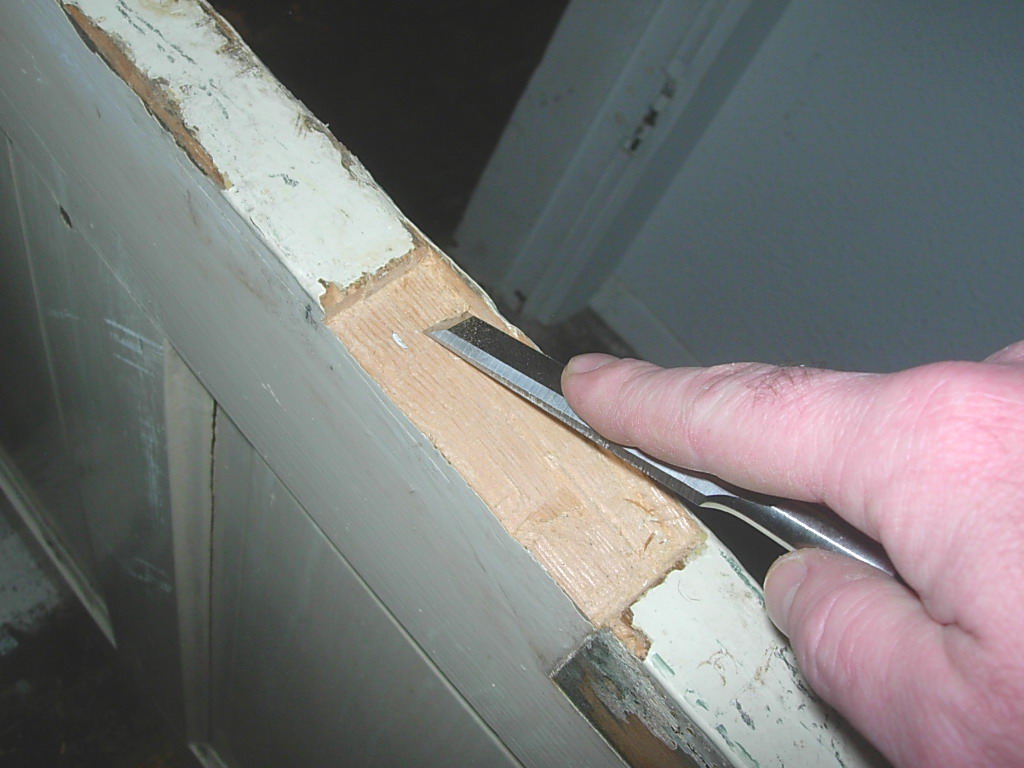
This biggest challenge to applying the finish panel is locating the openings for the outlets and switches in the panels. The challenge is that there isn't much room for error. Particularly the switches because since they are dimmers, the front face is nearly the size of the cover plates. I knew there'd be no way to cut the openings that precise, so I opted to disconnect them, and feed them through openings which were sized smaller for the electrical box to fit through. Here's a series of photos, in case I lost you:


Monday, November 27, 2006

All Insulation Covered

Although Simpson Door screwed up and pushed the delivery time of the french door out another 6 weeks, making a total of a 12 week lead time, I decided just to go ahead and finish the drywall in the bay window. I don't think installing the door should have much effect on it and besides: Progress. Must. Continue.

I'm so glad I don't have to look at the insulation anymore. I'm also starting to feel the dining room remodel come together with having completed this.

Before:

After:
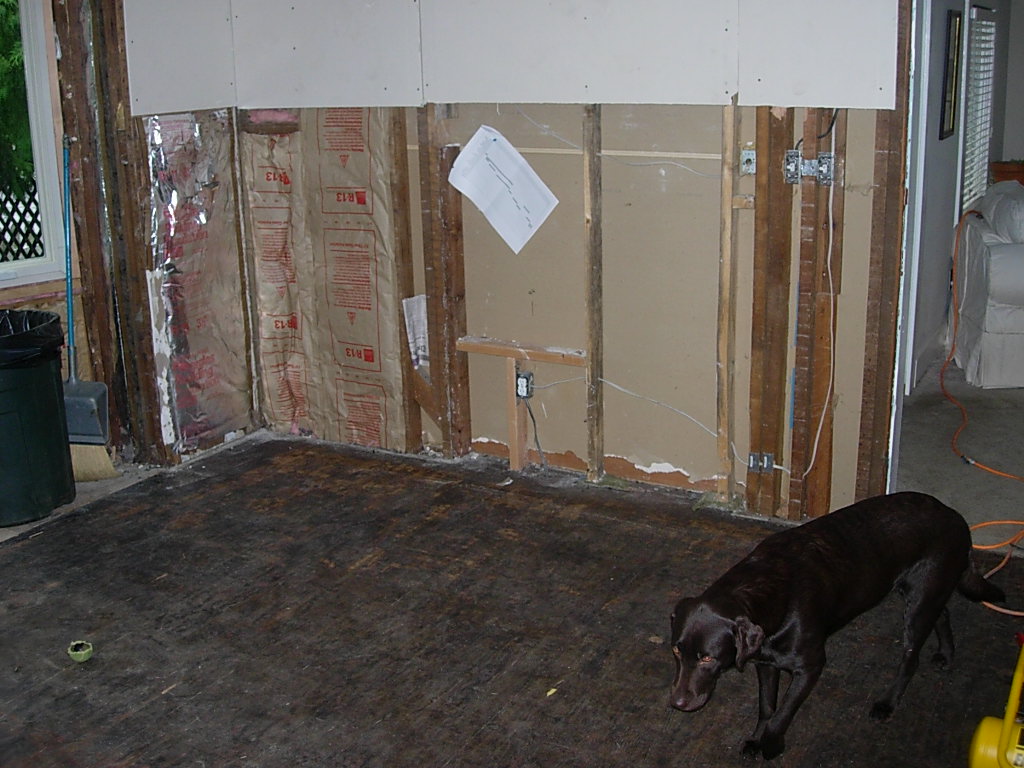
I don't know if it's noticable in the picture but due to the framing, there are some huge gaps in the drywall seams. The next step this week is to hire out for the drywall finish. Hopefully, whomever I hire can work some magic with my horrific drywall hanging.

Sunday, November 26, 2006

Pneumatic Nail Gun

With the start of the panel wainscoting, I have ventured into a new realm of remodeling - the pneumatic nail gun. It is really amazing how much it moves the work along. I figured it would and thought that this stage of the dining room remodel would justify buying one, but my expectations have been exceeded. Having said that, the tool is also pretty intimidating. Something about turning the compressor on and watching the gage climb up to 150 psi. That is a lot of pressure. I don't think that I'm so worried about backfire from the nail gun. But then again, maybe I am because everytime the compressor kicks on, I sort of jump.

Here's a picture of me within the first 15 minutes of using it. If I look relaxed, it's because the picture's totally staged.

Saturday, November 25, 2006

The Panel Wainscoting Has Begun

I've taken advantage of this 4-day weekend by getting a good jump start on the panel wainscoting. So far, I've just placed the first layer of plywood up to serve as "nail anywhere" surface for the actual panels. Since my studs have odd centers, I wanted to be able to hide any seams or nails with the stiles.

Before:


After:

Wednesday, November 22, 2006

To The New Owners in 2156

May they be enlighted with the fact that the best beer crafted by humans during this time of remodel was.......Full Sail Amber.


I also stuffed lots of newspaper articles in various spots in the wall for their future discovery, as well as a one dollar bill that I nearly had to reclaim in desparation for a quick cup of coffee at Bipartisan. Fortunately, I had my Bipartisan punch card full so I was due for a free cup.

One of the articles I stuffed in the wall was in regards to Mt St Helens and how the dome is growing so rapidly. Since I had been up there a month earlier, I decided to attach a picture of myself on the rim of St Helens, along with my name, date, etc. It's interesting to think of what the status of that volcano will be upon the time of discovering that article.

Tuesday, November 21, 2006

I've Graduated From Lathes


Last Sunday I completed the final touches to the stove pipe install, which consisted of a proper connection to the stove itself with an adapter, and stuffing some fire resistant insulation between the brick chimney and floor. It was now time to make real fire.

I started with some lathes and everything was going great until I had about 6 or 7 lathes really blazing. All of a sudden, smoke started pouring out of the top as if there wasn't enough draft. But how could that be when I had started it slowly? Regardless, I threw a couple of cups of water on it to control it and started over slowly. Very slowly.

Last night, I got the courage to put some real logs (big boy wood) on after warming up the chimney with some simple lathe burnage. It went well for the most part, but there was a moment when it really got going and the whole smoke leakage started up again. This time I was able to control it with the front dampers. With the odd smell of the smoke, I'm wondering if it's just a 'break-in' smell, like of paint burning, and not a draft problem. Time will tell.

Regardless, I'm really having a blast with this new stove. Adjusting the dampers and watching the fire react is really cool.

Saturday, November 18, 2006

Fall View From The Balcony

Not much to say, just a picture of a japanese maple "on fire" from the view off the balcony in the back. This only happens for about 72 hours a year.

I like the deep orange color against the gray, purplish sky.

Friday, November 17, 2006

Wood Stove Is Online

Almost online, anyway. I still need to get an adapter for the stove to the pipe. It's currently just being held by a tight fit. So tight that I can't get it on far enough to drive screws to secure the connection. Here it is in mid rope insulation:


My first burnable material - lathes from the old walls.


Here's a glimpse of the flames. I still can't verify for sure how good the draft will be. The small amount of newspaper was a-roarin' but the lathes never really took to it. I need to get some good firestarter blocks.

Wednesday, November 15, 2006

Crack!

I have found a few cracks in my chimney that I am about to hook up my wood stove to. I am not using a liner due to the ID of the chimney being only 4-1/2" x 8-1/2". From speaking to City of Portland inspectors, the dangers of not having your chimney lined lies mostly with carbon monoxide poisoning. However, I'm not UNcomfortable with this since I have carbon monoxide detectors and I will only being using the wood stove on an occasional basis. Like during those 5 really cold days in the Pacific Northwest.

But should I be worried about this type of small crack?

Tuesday, November 14, 2006

Why Labradors Enjoy Home Remodeling

Because the supply of wood scraps they get to chew on are endless!

In the chimey prep project for the wood stove, I needed to verify the gap between the chimney and floor. While doing so, I came across this little bit of plywood that was in the way. Not only did this provide an opportunity to use my reciprocating saw again, but Scully now could be put to work as a splinter making machine. That little piece took about 5 minutes to be turned into a pile of worthlessness. And yes, there's a little piece stuck to her nose.


Monday, November 13, 2006

Danger, Danger, Danger!


Per the city code, all masonry chimneys for wood stoves require a 2" gap between the chimney and any combustible material. Having the carpet on the upstairs floor laying right next to it seemed a bit dangerous, so I spent my Sunday morning cutting the carpet away, as well as cleaning all the crud that accumulated between the joists and chimney thoughout the years. While doing that I found some interesting collection of comics from 1934. Here's the "after" picture of the project. The reddish glow is from the lighting from below.


I still need to apply some sort of frame around the carpet on the floor, as well as add some fire resistant insulation to fill that gap. I did some research and found one local wood stove supplier has this insulation, but it's about $20 a foot!

Sunday, November 12, 2006

Chimney Connection

This morning I got motivated to make more mess with some mortar (alliteration not intended).

Here's the opening to the chimney as I found it:

Having such an odd shape as above makes for a difficult way to seal the stove pipe to the chimney, so I stuck a 7" stove pipe in the opening, with plans to fill the void with mortar:

And here's the final product, showing the fresh mortar placed in the void surrounding the 7" pipe. Probably half the mortar that I started out with ended up on the tarp that was on the ground below. It was quite a messy job.


To seal the 6" stove pipe to the opening, I plan to use some fire resistant insulation rope that the wood stove folks provided.

Wednesday, November 08, 2006

A Little Overkill

Don't get me wrong, I believe in over designing where necessary, just for the solid feel, but 3" nails for a tiny stike plate?


I finally got my necessary dimensions and obtained the door hardware at "the joove". It is unbelievable how not standard old door hardware is. I'm quite happy with how everything is fitting well, but I do still need to run and get some fasteners. I was stealing from the other old doors in the house, just to get all set up to verify it would work.

Tuesday, November 07, 2006

A Cool New Tool

A few weeks ago while in Home Depot, I came across a fairly good deal - a DeWalt compressor combo consisting of (2) nailers, and a compressor for $260. I wasn't quite ready to buy so I made my purchase of intention, and kept this in the back of my mind. I have several other DeWalt tools that have been great and having a nailer for the panel wainscoting seemed to be worth the price. I've never used one but I understand with installing trim, it is a humongous help because it's quick, chances of hammer dents are eliminated, and you don't have to set the finish nail.


I ended up buying it at Lowes last week for $233. The Home Depot that I originally found it had no more on the floor, and they were clueless as to when they'd be getting more in. Actually, they were clueless as to the very product I was talking about.

Imagine that....Home Depot not knowing anything about the products they sell.


Monday, November 06, 2006

I Love Mortising

I love it so much, that I went too deep and ended up having to shim to get the hinge flush with the new-old door edge. But really, mortising is surprisingly enjoyable. I like that fine hand work and precise detail. It might also have something to do with the fact that I successfully hung the new-old door within 2 hours! The last time I hung a door, it took me about 8 hours.


As I was working on this, I was thinking about what kind of old house this new-old door came from. I was also figuring that the hollow core door that I was now replacing, probably replaced some other heavy 5-panel door. Then I wondered, that replaced door is probably now in some other old house in town. Maybe the same house that this door came from? Whoa.

I still need to paint, install a knob, new strike, etc. but I'm really liking that 5-panel look. See if you can spot Scully. She sort of blends into the floor, being all dark chocolate and stuff.

Sunday, November 05, 2006

A New-Old Door

I actually bought this old salvage door last Thursday but just now I'm getting around to posting. I bought it at Rejuvenation, after hitting a few other less spendy salvage places in Portland. My upstairs has three of the 5-panel door style that are nice and heavy. My goal is to eventually have all the interior doors that 5-panel style. Just say no to cheap hollow core.

I got pretty lucky as I found very few old doors that matched the dimensions I needed. Let's just see how lucky I get when I go to hang it...

Here's the door, stuffed in my CR-V:


Wednesday, November 01, 2006

Floor Vent

So far, this has been the easiest part of the dining room remodel. I was even able to get a chunk of it done, while still dealing with the ALL the trick-or-treaters tonight. All 3 of them. I guess the brisk east wind is a little much for them.

Anyway, the vent is currently in the wall.


But, I thought this would interfere with the panel wainscoting too much and I like the looks of the old fashioned floor register. So, today during lunch, I ran around town looking for one, and finally got this one at Rejuvanation for $95. I still need to refinish it, but I'm really liking it already.


I'm also loving my reciprocating saw (Saw-zall). It's so easy to use. I can't believe I functioned without one for so long. I got this hole cut out in less than five minutes.

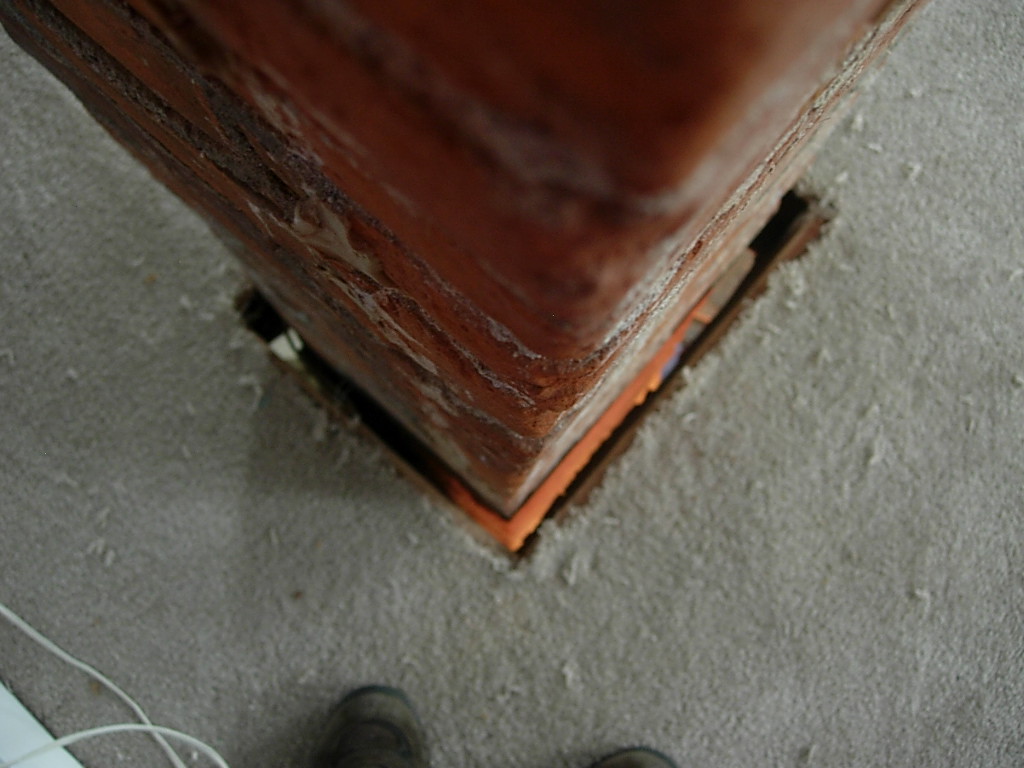
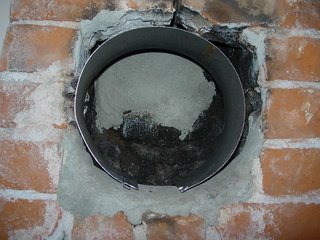
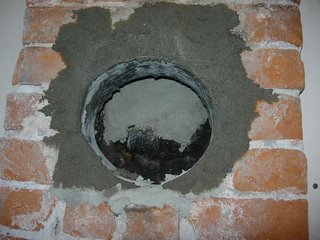
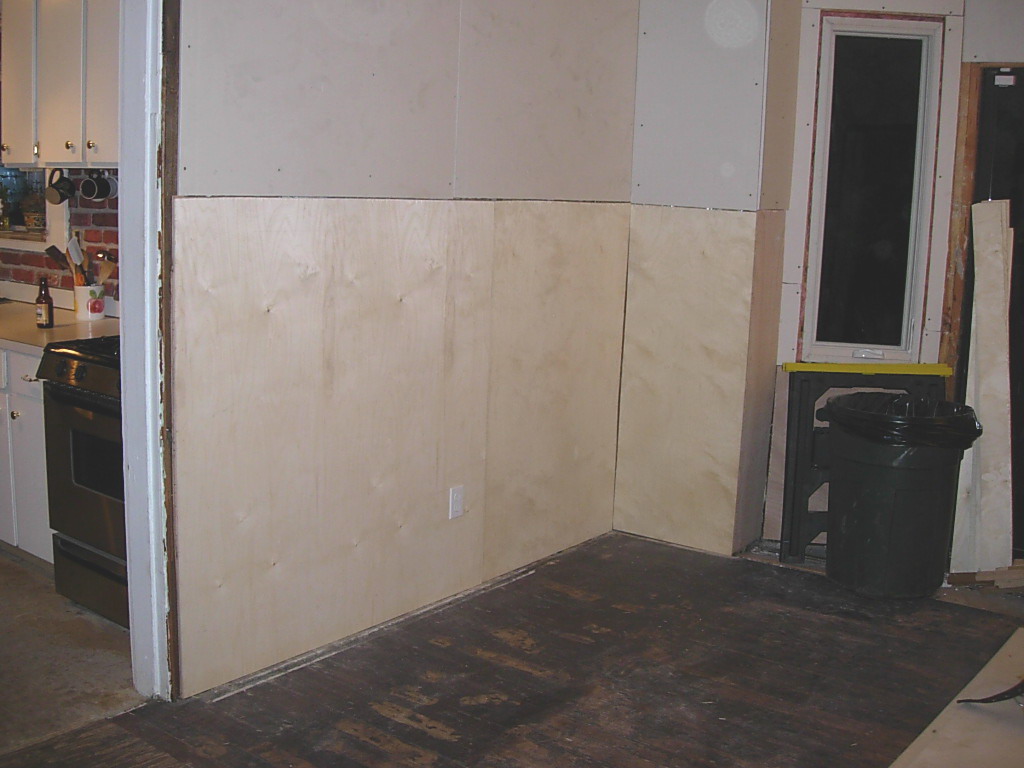
All that is left is obtaining some duct work, and hooking it all up, and I'm on to the next stage of the dining room remodel.
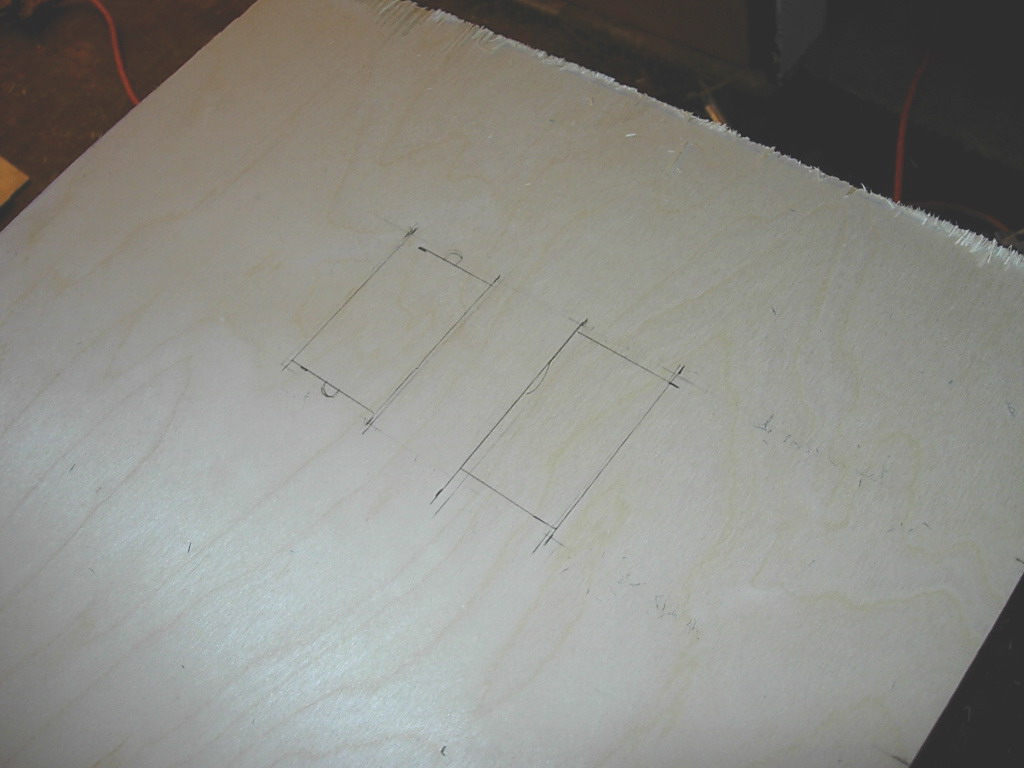