Tuesday, June 11, 2013

Plants

The main reason for contracting out to Jane Coombs for a landscape design was that I knew little to nothing about what plants would survive under the thick canopy of the Douglas Fir trees that I planted in 1996. After failing at few plantings in the past, or at least not satisfied with how it looked after a year or two, I thought the investment would be worth it.

I used Jane's list of plant names (in Latin) and with the help of the Google, I tracked down a nursery that carried the bulk of the plants - Forest Farm and they were in my same state. Unfortunately, I was at the north part of the state, and they were way south, so I had to have them shipped.


Depsite being in boxes, they turned out to be in very good shape.

Here are most of the plants. After I ordered and shipped 'Polystichum polyblepharum', I felt pretty silly finding out that it is a common fern which are like weeds out here. But I my intention was to stick to Jane's design.


Jane was insistent on a great big pot outside the dining room.


It took me about 8 hours to get most of the plants in. The next day I had little desire to plant the remaining few.


This Carex M. (ice dance grass) is going to look great under landscape lighting.

Thursday, June 06, 2013

Peeler Poles

For an added feature of the hardscape, the landscape designer included "peeler poles" to the edges of a couple of mounds. It's basically ranch fence posts that comes in several different diameters and placed at random heights. With the various berms in the landscape, it helps keep the dirt off of the trees and house.

Though the heights of the poles are to be random, that doesn't stop this anal retentive guy from organizing out pre-determined cut lengths. Yes, that's an iPad. I forgot to print out. Another testament to Apple - the iPad cleaned up from the sawdusting nicely.


Having the different diameter poles organized by length really helped to pull quickly as the poles were placed based on the drawing layout I created seen below.

Done on AutoCAD, this helped in determining placement as well as quantity to buy.


And the first pole is placed. The trench is roughly 12" deep except where there are roots. I added an inch of Quikrete dry to the base, then added the poles, and filled up with more Fast setting Quikrete which was dry. This allowed me to manipulate and straighten the poles as I worked. Once they were set, I'd add water to the Quikrete. Worked great.


Tuesday, May 21, 2013

Pathways

Once the round patio was installed, it served as the benchmark elevation for the pathways. Creating a level path throughout made for a challenge due to the screwy topography of my yard. Loads and loads of dirt were needed near the end.

I used the same material (Three Rivers) for the pathways. Since the pieces were smaller, it ws a little more tedious than the circular patio.


Since my working hours were limited to about 2 to 3 in the evening after work, I'd set a line in the path that I'd make myself reach. It definitely help keep me focused on completing.


This is an early picture prior to setting the sand in between the pavers. With the smaller pieces, they tend to move when walked upon. I will eventually add a mortar and sand mix to solidify the setting.


I tried to keep the path as level as possible but since I was connecting up to another pathway a few inches lower, I allowed a gradual slope.


My favorite part of the paths are the curves. 

Friday, May 03, 2013

Round Patio

This is my first stab at placing flagstone so I wasn't too sure what to expect but I was really looking forward to the results. That in itself would be enough motivation to get this segment of the project rolling.

The patio will be 11' in diameter and be the central focus of the landscape project. I am using Three Rivers rock out of the Sawtooth mountain range in Idaho, with black basalt pavers at the circumference giving it a bit of a framed look.


After digging and redigging to get the required 6" depth, I start with a metal post directly in the center as a reference point to ensure a true circular shape.


The first layer consists of 3/4"-minus rock to serve as a base, about 3" to 4" thick.


I use a 2x4 from the center post with a level attached to give a rough, flat starting point.


I added multiple holes in the 2x4 for adjustment since the bench encroaches (on purpose) into the patio.


More base for the center.


After the 3/4"-minus is compacted  (me jumping on a 12x24 piece of wood), I add the sand. Only about 1" to 1-1/2" is needed.


I used a string tied to the center post for positioning, along with the level to start placing the black basalt pavers.


I'd do a spot check every so often for levality as I made progress around the circumference.


The circumference is completed. Time to rock and roll.


Since the Three Rivers flagstone was about 1-1/2" thick, I just used a 2x4 below the original 2x4 guide to level the sand.


I'm not sure what sort inherited strength I got to move that huge first piece, but I still had all my toes at the end which was good. 


The first several pieces were easy to fit in. Near the end, I had to do a lot of cutting with a 4" grinder saw. Just ask my neighbors - they can tell you how much cutting I had to do. 


This is a good shot showing the various colors of the Three Rivers stand up rock, as the call it.


Passed inspection. Barely.

Tuesday, April 30, 2013

Rock Wall Seating Bench

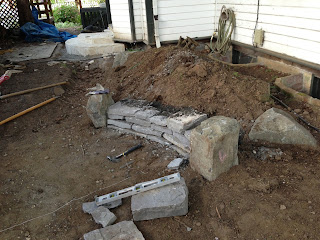
The boulders are in place for the most part and I'm really amped to get going on the round patio and pathways, but before I can do that I need to get the rock wall seating bench in place. Or at least the base of it.

I start with about 4" to 6" of 3/4" minus as a base then start building with split grey basalt. Since it's conforming to the outside of the 11' diameter round patio, I can use squares and rectangular pieces rather than hunt and pick for concave shapes.

The first 4 layers. As it's built, I fill the back with 3/4"-minus rock and let it migrate between and below the stone. This helps support and steady the unlevel surfaces.


Moving along slowly. I try and vary the rock height to give it character but that creates lots of challenges. 

At this point I stopped building the wall and would complete later. This part of the project was moving too slowly and I was anxious to get to the patio part.


The completed rock wall bench seat. The top pieces are the same material as the round porch and pathways and are mortared in, giving it a solid feel.